Thursday, February 27, 2014

Optimum Shooting Stance...

Find Your Optimum Shooting Stance
MARTY HAYES

One of the great debates in modern pistolcraft is what stance should a person use.

By “stance,” I mean how one stands while shooting a handgun at a target. I have studied this issue for more than 30 years, entering the study with no preconceived notion of what is best, and have come up with what I believe is a reasonable and effective way of making this choice.

UNDERSTANDING THE TERMS

Strong Hand
The hand one primarily grasps the handgun with; the dominant hand.

Weak Hand
The hand other than the strong hand; the non-dominant hand.

Dominant Eye
The stronger of the two eyes, usually the same side as the dominant hand, but not always.

Non-Dominant Eye
The weaker of the two eyes, usually opposite the dominant hand, but not always.

Cross Dominant
When a shooter has a dominant right hand and a dominant left eye, or vice-versa.

Get a Grip!
THUMBS FORWARD GRIP: A method of gripping the gun which requires the shooter to cock his weak wrist forward toward the target and then wrap his fingers around his strong hand, while digging the weak hand pad of the thumb into the grip of the handgun for recoil control and stability of the handgun. 

Additionally, the thumbs point forward (toward the target), with no overlap.
I believe for this article, it would be prudent for me to actually write as if I were teaching a group of people about grip and stance, as if I were teaching a class, instead of writing directly toward an instructor audience. It will make more sense. So with that out of the way, let’s talk grip and stances, and why one grip and stance might be more effective than another.

Human beings have some instincts which if utilized, make shooting a handgun very easy. The first instinct is clenching the fist. We do this in anger or under stress, when holding onto an object like a stick, or in order to hold on to a recoiling pistol. 

So, taking advantage of the “fist instinct,” if you simply make a fist around the handle of the gun and take into account proper finger placement on the trigger (as discussed by Tom Givens in the last issue) then your grip on the handgun will be correct.

THUMBS LOCKED DOWN GRIP: A method of gripping the handgun which allows the shooter to take a natural hold around the gun with the shooting hand (as if making a fist), along with the weak hand reinforcing the strong hand grip by allowing the weak hand thumb to lock down over the strong hand thumb, and fingers of the weak hand wrapping around into the grooves between the fingers of the strong hand.

Ever since the handgun was first invented, this type of one-handed grip has been used with great success. Now, if you want to steady the handgun and control the recoil even more, you would reinforce the strong hand grip with the weak hand.

Alternatively, you could use the thumbs forward grip, grasping the gun the same basic way but resting your thumb alongside the frame or slide rather than curling it down into a fist.

One of the big problems with this is that it doesn’t by itself allow for very good one-handed rapid fire shooting. Without the use of the opposable thumb, the gun dances around in the hand. To rectify this, the weak hand is used to stabilize the gun, using the base of the weak hand thumb to press into the side of the handgun grip. In fact, I have seen some shooters who use this grip put skateboard tape on the gun at this point, to increase the effect of the left hand.

Either grip, thumbs curled or thumbs forward, will work just fine, with some exceptions. The first set of exceptions deals with the thumbs locked down grip. If a person using the thumbs locked down grip has very large hands with a small gun, the strong hand thumb might interfere with the shooter pulling the trigger. Conversely, if the shooter has very small hands and a large gun, they may not be able to comfortably reinforce the grip with their weak hand. If the shooter is wearing gloves (like SWAT teams and military special operations teams do), that might also interfere with locking both thumbs down. In all of these cases, the thumbs forward grip might be the best choice.

The second set of exceptions deals with the thumbs forward grip. The thumbs forward grip does not control recoil as well as the thumbs locked down grip, especially when shooting one handed. 

So when shooting a hard kicking handgun, the thumbs down grip is likely preferred. Further, if you must use the gun to strike with (or if you get in a struggle over control of the gun), it makes more sense to make a natural fist and curl the thumbs down to hang on to the gun.

Additionally, the thumbs forward grip doesn’t work well with sub-compact guns because the weak-hand fingers are often too close to the muzzle, or to the cylinder gap if using a revolver. Finally, when using the thumbs forward grip the shooter is likely to push down the slide release/slide lock button, so the slide doesn’t lock back after the last shot.

So, there are your choices as far as grip goes. I would recommend you try both, and settle on the one which makes the most sense for you after taking these variables into consideration.

Weaver vs. Isosceles: A History Lesson
WEAVER STANCE: The shooter stands slightly bladed in a classic “boxer’s stance” and pushes the gun toward the target using the strong hand, while at the same time pulling back the gun hand with the weak hand.

Back in the 1970s, the state of the art in combat handgun training was the point-shoulder isosceles stance, where cops using large revolvers found their greatest success standing square to the target, sticking the gun out fully, arms locked, with both arms and shoulders forming an isosceles triangle. Loads used were light kicking .38 Special wadcutters or standard 158 gr. round nose bullets. Full power loads were saved for duty use as they kicked more and were more expensive.

But when Jack Weaver, Jeff Cooper and the other guys from the Southwest Combat Pistol League started competing in Leatherslap competitions (later forming IPSC), the stance of choice for these men became the stance Jack Weaver first used in competition, a bladed stance with both elbows bent, which Cooper named the Weaver Stance. It worked very well when using 1911 handguns, although Weaver himself continued to use a K-38 revolver.

ISOSCELES STANCE: The shooter grasps the gun with two hands, extending the arms straight out toward the target with the two arms and the shoulders forming an isosceles triangle.

Primarily due to the overwhelming success in competition, the Weaver stance gained overwhelming popularity through the 1980s and into the 90s, replacing the point-shoulder isosceles stance. But, primarily due to the shift to high capacity, large framed semi-auto pistols in the late 90s to the present, the isosceles stance has again made a resurgence.

What is lost to most students and instructors in this discipline (and the underlying premise of this article) is the theory that in each of these cases, the hand size of the shooter as it related to type of gun used, ultimately dictated the stance which became most popular. 

When the cops were shooting large frame revolvers, the gun fit their hand in an offset grip, and thus the eye, rear sight, front sight and target naturally lined up when using the isosceles stance, resulting in success when sighting the gun.

But, when the boys from Southern California started shooting with their 1911s, the guns naturally fit their hands in an in-line grip, especially since their 1911s were all outfitted with the standard short military trigger. The in-line grip naturally worked well with the bladed Weaver stance. In addition, these explorers of the Modern Technique of the pistol all used full power handguns, which recoiled quite a bit more than the old .38s the cops had been using. The dynamic push-pull of the Weaver stance helped control this recoil.

Then, when the guns of IPSC turned into high capacity, fat-bodied guns using compensators to manage the recoil, the shooters were able to go back to the isosceles stance. Additionally, because most IPSC competitions involved moving into, shooting and moving out of shooting boxes, they found the isosceles stance allowed for a quicker transition. When the guns of IPSC all started sporting scopes instead of iron sights, the shooters started bending their elbows to get the scope down in front of their eyes.

Thus, the current modern isosceles stance (as taught by many, many shooting schools and instructors) evolved from the type of gun being used. It is also no coincidence that most people who advocate this type of stance also shoot light kicking 9mm handguns.

Other Considerations
There are also a couple of other considerations. One very important part of the equation is eye dominance. If you are cross dominant, and have an offset grip as previously described, then the isosceles stance is absolutely the stance for you. Don’t let anyone convince you otherwise.

If you are not cross dominant, and have an in-line grip, then the Weaver stance will be much more intuitive, as you simply can use your natural pointing instinct to point your strong arm and gun at the target, and the sights will naturally be lined up for you. But, if you are cross dominant and have a gun that fits your hand in an in-line grip, you have a little more work to do. In this instance, I would first suggest using a fatter gun, which sets up an offset grip, and then use the isosceles stance.

If you just can’t part with your 1911, then consider going to the thumbs forward grip, because one of the advantages of that grip is that the weak hand, when used to support the side of the gun, also tends to bring the muzzle back in line with the centerline of the body. The disadvantage is that if you shoot one handed, you loose this crutch. But it is probably still the best option.

…shoot a lot, and dry fire even more using this stance, until this optimum stance becomes your “default stance,” the stance you naturally go to when you draw your handgun.

Another option for cross dominant shooters is to tilt the gun slightly to bring the sights in front of your dominant eye, which will also result in a shift of point of impact of the bullets.

Finally, I would suggest that you experiment and develop you own unique stance, conditioned upon hand size, grip size and eye dominance. You may not be pure Weaver, or pure isosceles, but instead, some bridge or hybrid between the two stances. Play with these concepts to the extent that when you bring the gun up to eye level, there is no fiddling around with the gun to find the sights. Then, shoot a lot, and dry fire even more using this stance, until this optimum stance becomes your “default stance,” the stance you naturally go to when you draw your handgun.

Finding your optimum shooting stance is the first step in successful low light shooting, because once you find your optimum shooting stance, seeing the sights (at least in close up encounters), becomes irrelevant. We will discuss this when we discuss low light shooting.
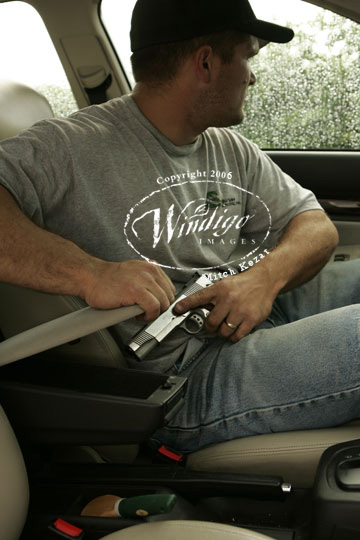
You should:
“…experiment and develop you own unique stance, conditioned upon hand size, grip size and eye dominance” when shooting targets, while also dry fire practicing the unconventional grip and aiming scenarios which may occur in a real emergency situation.

https://www.usconcealedcarry.com/training-tactics/find-your-optimum-shooting-stance/

Wednesday, February 26, 2014

Second Habit Of Highly Effective Shooters

The Second Habit of Highly Effective Shooters....

Grip
Your grip is your connection to your weapon system. Without a good grip, your weapon will go to the path of least resistance and your shots will fly aimlessly off its mark. Most novice shooters will grip their gun by copying what they’ve seen in pictures or movies, but there’s a better way! Don’t follow Hollywood, think outside the box – hell, ACT outside the box and you’ll tighten up those ugly shot groups in no time!

Pistol
The most important part about griping your gun correctly is selecting a gun that fits your hand. Guns are built to a variety of specifications and so are your hands. It’s a good idea to start off with something that fits your hand rather than try to adjust your grip to fit a gun. Head out to your favorite Gun Mart before your purchase a gun to see how it feels in your hand. Some guns these days have different grips or back-straps you can change out for a better fit, so check to see if these are available. The gun should fit comfortably in your hand with the forearm of your firing hand in a direct line behind the pistol and your trigger finger should be able to reach the trigger without dragging along the side of the gun. We’ve all heard the saying, “If the glove doesn’t fit, you must acquit.” When it comes to guns, “If the gun doesn’t fit, you’re not going to hit.”

Now that you’ve selected the right piece of equipment, let’s talk about how to control that explosion going off in your hands. When you grip the gun, make sure that the forearm of your strong hand is in line with pistol. Just like I talked about in the First Habit of Highly Effective Shooters, it’s important to have as much of your body behind the gun as possible to control recoil, and it starts here with a pistol. Your hand needs to be as high up the gun as possible. In a perfect world you would have your hand directly behind the barrel, but guns have moving parts up there making this impossible. Keeping this in mind, your hand should be high enough on the grip so the webbing of your hand is compressed on the beaver-tail. Wrap your hand around the gun and make sure your trigger finger is not riding along the side of the grip as this can pull the gun off target as you press back on the trigger. Don’t get caught up on placing your trigger finger in a certain spot on the trigger. Everyone’s hands are built differently and what works well for a paper shooter on a one-way range may not work for you when you hear the snap of rounds whizzing past your pineapple. Just make sure you’re able to press the trigger straight back while keeping your sights on target.

If you’re using a two-handed technique (and I suggest you do whenever possible), the support or reaction hand should be placed with the palm of the hand filling the space on the grip left by the strong hand. To do this your support hand should be angled down at about a 45-degree angle. Some people teach a 60/40 grip for how hard you should be gripping the gun. I teach a 100/100 grip since that’s what you’re going to do in combat and it’s best to think about how you’re going to drop the threat rather than how hard you’re squeezing the gun. Both your thumbs should be pointing forward. I’ve found that the more things you have pointed at your target, the better chance you have at hitting it.

Carbine
The grip for the firing hand of a carbine is the same as a pistol. The gun is controlled with support hand, leaving the strong hand to concentrate on fire-control. Before I talk about the forward grip of the carbine, I need to talk about accessories such as lights or lasers. Before you start tricking out your bang-stick with cool-guy gear, make sure you can shoot it accurately. Take it out to the range and establish a solid shooting position and note where your forward hand grips the gun. Now look at the open space you have available…this is where you need to mount accessories. I see a lot of guys on the range saying they can’t grip the gun properly because something is in the way. Don’t let the tail wag the dog! You need to be able to shoot effectively first or that cool new light is not going to do you any good.

Now that we’ve cleared the playing field, grip your gun as far out on the gun as possible. I ask my students; if you were going to nail a 2×4 to a wall and only had two nails, where would you put the nails to give you the most support? The answer is always the same, as far apart as possible. If you want to support your gun, you need to do the same thing. There are a number of different ways to grip the gun, but it’s important that some part of your hand is above the level of the barrel. The recoil of the gun is going to kick the gun up. If you’re trying to hold the gun from underneath it’s going to bounce out of your hand every time. For the same reason it’s important that you take that hinge-point (elbow) out of the equation. Most people I see on the range shoot with the support elbow directly beneath the gun giving the weapon a perfect hinge to move around. By simply rotating the arm out to the side, you eliminate the hinge and are better able to drive the gun. As with the pistol I like to point anything I can at the target. In this case, depending on your grip, you can either point your thumb or your index finger.

Get a Grip!
If you didn’t want to read all the fine-print above, make sure you write this stuff down in your range book:

Select a gun that fits your hand.
Establish your grip from the holster.
Get your forearm in a direct line behind the gun.

Get your hand as high as possible of the gun.

Squeeze the gun with both hands…hard.
Put your finger where it fits and press straight back.
Point everything you can at your target.
Remove hinge points.
Dry-fire!

http://centermassgroup.com/2011/08/the-second-habit-of-highly-effective shooters/#sthash.47xkxme8.dpuf

Monday, February 24, 2014

Concealed Carry Skills You Can Bank On...

Concealed Carry Basics You Can Bank On

Galco Gun Leather Photo.

Galco Gun Leather Photo.

From knowing how to choose and maintain a handgun, to understanding when you are justified in drawing the gun, both beginners and longtime armed citizens alike can benefit from reviewing the basics.

The Higher Standard

Anyone who legally carries a concealed handgun or who is trained in the martial fighting arts is held to a higher standard of conduct both morally and legally. That means the legally armed citizen must think about the use of force continuum. The amount of force that you use to defend yourself must not be excessive under the circumstances. It must, rather, be proportionate to the degree of force with which you are confronted.

There must be an overt act by a person that indicates he immediately intends to carry out a threat, in order for deadly force to be justified. Verbal threats don’t begin to come close to constituting this kind of justification.

You must reasonably believe that you will be killed or suffer serious bodily harm if you do not immediately take the life of your attacker. And, when it comes to employing deadly force in the defense of another person, the circumstances must justify that person’s use of deadly force in his or her own defense. In other words, you must “stand in the shoes” of the person being threatened or attacked.

The actual use of a firearm for self-defense is the highest level on this force continuum and the last resort. When you carry a concealed firearm, you must use extra discretion.

The Gun Corollaries

10s-7-75Two is better than one, and three or four are even better, but one is a basic minimum. However, it is not enough to just own a gun. There are a number of corollaries to this tenet.

The first and primary corollary is that you must know how to use and maintain your defensive emergency rescue equipment. Therefore, you should read your gun’s owner’s manual and, if you are new to guns, you should get competent hands-on instruction.

The time arising where and when you really need to use your handgun is not the time to be figuring out how to most efficiently work its manual safety or decock the hammer! You also need to keep your guns clean. Your guns, as emergency rescue equipment, should be kept in good condition. That requires regular cleaning, adequate lubrication, and periodic inspections and function checks.

A second corollary is that you should join a gun club and attempt to make like-minded friends. One of the secrets of success and happiness, as well as personal safety and security, is building a support network of human resources. This can be done by making friends with available individuals whose talents and abilities complement your own.

Not only will you have fun, you will benefit from the camaraderie. If you have a computer, check out several quality online discussion forums where you can make friends and share knowledge. A third corollary is that you need to go to the range and shoot regularly, so that you become comfortable and accurate with your defensive handguns. You must make shooting them a basic reflex. So join a gun club or range. You’ll meet nice people, and it’s cheaper than paying by the hour for range time.

Finally, you should also practice handling your unloaded defensive handguns at home. This is called dry practice, and it can build and strengthen your muscle memory for gun presentation and handling. Dry practice develops your unconscious competence in gun handling.

Firearm Safety Guide...

Firearm Safety Guide

Firearm Safety Guide

Basic firearms safety awareness is an absolute necessity for any prepper. Before you chamber the first round, take a safety class at your local gun range that’s instructed by Certified NRA Instructors. Regardless of the disaster you’re facing basic firearms safety is must always be applied. Note: if you’ve been diagnosed with manic depression, bipolar disorder, schizophrenia and etc., gun ownership is not for you. There are three rules for basic firearm safety that are used at all times when handling a firearm:

  1. Keep your gun barrel downrange and in a safe direction
  2. Keep your finger off the trigger until ready to shoot.
  3. Keep the gun unloaded until ready to use.

Commit the following safety guidelines to memory:

  • Know where each bullet is going
  • Keep your gun clean and ready to fire safely and in working condition.
  • Know your gun and its operation.
  • Always use the correct ammunition for your gun.
  • Wear hearing and eye protection as appropriate.
  • Never be under the influence of narcotics or alcohol when operating and handling a gun.
  • Secure guns so they are not accessible to unauthorized persons.
  • Be aware that certain types of guns and many shooting activities require additional safety precautions.

Firearm Safety Guide – Gun Type and Action

The two basic types of firearms are pistols (handguns) and long guns. The most common types of pistols in use today are revolvers and semi-automatics. The most common types of long guns are rifles and shotguns.

To understand how a firearm works, it is first necessary to understand the firearm’s action. The action is a group of moving parts used to load, fire, and unload a gun. A gun is usually identified by its type of action. Various gun actions and unloading techniques are described in this brochure. When unloading a gun, always eject the cartridges into your hand or onto a soft, clean surface.

Long Guns

A typical bolt-action long gun is shown here with the names of some of its parts. Various types of long gun actions are shown throughout this guide.

Firearm Safety Guide – Magazines

Some long guns use a ‘mag’ or a magazine. A magazine is a storage device designed to hold cartridges ready for insertion into the firing chamber. The location of the magazine may vary depending upon the action, model, and make of the gun. Various types of magazines also exist. Two of these magazine types are described below.

rifle magazineA box magazine is usually found in the location shown here. Some box magazines are detachable and can be removed by depressing a button, latch, or similar release device. Other types of box magazines are not detachable. Some have a hinged floor-plate, and are unloaded by pressing a release device that allows the floor-plate to open and the cartridges to drop out of the magazine. Other types of non-detachable magazines do not have a releasable floorplate, and the cartridges are usually ejected by carefully opening and partially closing the action.

tubular magazineA tubular magazine is usually found in one of the locations shown here. Some tubular magazines have an inside tube which must be removed in order to let cartridges drop out of the magazine. The action must also be opened and partially closed several times in order to be sure that no cartridges are left in the magazine. Other types of tubular magazines do not have a removable inside tube, and the cartridges are usually removed by carefully operating the action of the gun. Because a cartridge can become stuck in a magazine tube, the gun may still contain a cartridge after the above steps have been taken. Therefore, leave the action open to prevent a cartridge from being moved into the chamber.

Firearm Safety Guide – Bolt Action

Bolt actions are opened using a lift and pull motion similar to that used to open a door bolt or gate bolt.

X-Bolt-Hunter-MID-035208-l

To Unload:

  1. If the gun has a detachable box magazine, remove it. If the magazine is tubular or non-detachable, see “Magazines” above.
  2. Open and partially close the action several times by operating the bolt to be sure that all cartridges are ejected.
  3. Inspect the chamber (plus the action and any tubular or non-detachable magazine) to be sure that the gun is empty.

Firearm Safety Guide – Lever Action

Lever actions are opened by pulling the lever down and away from the stock, and are closed by returning the lever to its original position. Most lever-action guns have tubular magazines, but some models may use box-type magazines.

Henry_Lever_Action_Magnum

To Unload:

  1. If the gun has a detachable box magazine, remove it. If the magazine is tubular or non-detachable, see “Magazines” above.
  2. Open and partially close the action several times by operating the lever to be sure that all cartridges are ejected.
  3. Inspect the chamber (plus the action and any tubular or non-detachable magazine) to be sure that the gun is empty.

Firearm Safety Guide – Pump Action

Pump actions are operated with a pumping motion. The action is opened by pulling the fore-end of the gun to the rear, and closed by pushing the fore-end back to its original position. Some pump-action guns have tubular magazines, while other models use box-type magazines.

pump action shotgun

To Unload:

  1. If the gun has a detachable box magazine, remove it. If the magazine is tubular or non-detachable, see “Magazines” above.
  2. Open and partially close the action several times by pumping the fore-end to be sure that all cartridges are ejected.
  3. Inspect the chamber (plus the action and any tubular or non-detachable magazine) to be sure that the gun is empty.

Firearm Safety Guide – Semi-Automatic Action

ar15

Semi-automatic actions are opened by pulling the bolt handle straight to the rear. Some semi-automatics have tubular magazines, while other models use box-type magazines.

To Unload:

  1. If the gun has a detachable box magazine, remove it. If the magazine is tubular or non-detachable, see “Magazines” above.
  2. Open and partially close the action several times by pulling the bolt handle to the rear to be sure that all cartridges are ejected.
  3. Inspect the chamber (plus the action and any tubular or non-detachable magazine) to be sure that the gun is empty.

Firearm Safety Guide – Hinge Action

double barrel hinge action

Hinge actions are opened by moving a release lever to one side, and then moving the hinged barrel(s) downward. Hinge-action guns do not have magazines.

To Unload:

  1. Activate the release lever and move the hinged barrel(s) downward.
  2. Opening the action may cause the cartridges to be ejected from the firing chamber(s). If the cartridges are not ejected, remove them from the chamber(s) with your fingers.
  3. Inspect the chamber(s) carefully to be sure that the gun is empty.

Pistols/Handguns

Firearm Safety Guide – Revolvers

colt pyhtonA revolver is a pistol with a revolving cylinder that holds cartridges in individual chambers. Each time the hammer moves to the rear, the cylinder turns and brings a chamber in line with the barrel and the firing pin. When the hammer falls, it causes the firing pin to strike and fire the cartridge. In single-action revolvers, the trigger performs only one action — releasing the hammer. The trigger does not cock the hammer. The hammer must be cocked with the thumb, and will stay in a cocked position until it is released by pulling the trigger. In a double-action revolver, the trigger performs two tasks. When it is pulled, it will cock and release the hammer. Most double-action revolvers can also be fired in a single-action mode by manually cocking the hammer with the thumb.

To Unload Single Actions:

  1. Hold pistol in left hand by cupping hand so that the trigger guard is in the palm of the hand with the left thumb on the left side of the cylinder, and the index and middle fingers on the right side of the cylinder.
  2. With your right thumb, open the loading gate. (*If the cylinder now turns freely, proceed to step 4.)
  3. Use the right thumb to pull the hammer back two clicks. The cylinder should now turn freely.
  4. Grasping grip with right hand, use left thumb and fingers to align a loaded chamber with the loading port by turning cylinder.
  5. Elevate muzzle in a safe direction; using left hand, push cartridge out of chamber with ejector rod. Continue process until all chambers are empty.
  6. SLOWLY rotate cylinder with left thumb and fingers while inspecting each chamber to be sure that all cartridges have been removed.
  7. Close loading gate. Place right thumb on hammer spur. While controlling hammer with right thumb, pull trigger with right index finger to release hammer, using right thumb to gently lower hammer completely.

To Unload Double Actions:

  1. Use right hand to place pistol in palm of left hand. Operate cylinder release latch with right thumb; push cylinder out with the two middle fingers of left hand.
  2. Place left thumb on ejector rod and elevate muzzle in safe direction. Use left thumb to push ejector rod completely to rear, removing cartridges from chambers. Inspect all chambers to be sure that they are empty.

Semi-Automatics

1911A semi-automatic is a pistol that has only one chamber located at the rear of the barrel. Cartridges are held in a storage device called a magazine. When the pistol is fired, the slide moves to the rear, ejects the empty case, and usually cocks the pistol. On its return movement, the slide picks up a cartridge from the magazine and pushes it into the chamber.

To Unload Semi-Automatics:

  1. Hold pistol in right hand. Activate magazine release, and remove magazine from gun. (Magazine release locations vary — consult instruction manual or knowledgeable individual.)
  2. Grasp rear portion of slide with left hand, and move slide completely to the rear, ejecting the cartridge from the chamber. If the pistol has a slide stop, use it to keep the slide open.
  3. Inspect chamber to be sure that it is empty.

Muzzle Loading Guns

muzzle loading gunA muzzleloading gun is so named because it is loaded through the muzzle. It does not use cartridges; instead, it is usually loaded by pouring a measure of black powder into the barrel, and pushing a cloth patch and lead ball into the barrel on top of the powder charge. Muzzleloading firearms are available in long gun and pistol models. Due to the construction of a muzzleloader, it is not easy to tell if it is loaded. Don’t try to determine this yourself; instead, have a knowledgeable person make sure that the gun is unloaded.

This firearms guide is not intended as a complete course in gun safety and is not a substitute for formal, qualified instruction in the handling, use, or storage of guns.

http://uscrow.org/2013/02/06/firearm-safety-guide/


Shooting from your car...

Shooting from Vehicles: Basic Techniques

I would like to cover some basic techniques for shooting from vehicles. The topic could fill much more space than I have here, so I intend to hit the highlights. We will leave for another day the topic of shooting from moving vehicles and concentrate only on stationary vehicles.

This is an image of a man shooting from his carThere are several things you should think about before you find yourself confined to the inside of your vehicle when an armed confrontation arises. First, if at all possible, you want to drive away – through/over the perpetrator if you can! Two actions to avoid are ducking for cover inside the prison of your vehicle or trying to back away from your assailant. These tactics will in all probability hasten your demise rather than prevent it. The remaining options, which are the topics of this article, are how to return fire while confined to the interior of the vehicle.

Good people don’t typically have the luxury of determining the time and place of their gunfights. The bad guy usually dictates the terms. All we can do is meet his challenge to the best that our training will allow.

With that in mind … how do we train to engage in a gunfight from inside a vehicle?

Considerations

The first, albeit minor, consideration is to remember that when firing a weapon in a confined area, there is increased overpressure every time a round goes off. This overpressure can potentially be a little rattling but in all likelihood, during the stress of combat, it will be of little significance.

This is an image demonstration how to shoot from different anglesSingle occupant, front seat, two-hand, full extension through passenger-side window and driver’s-side window.

It is of paramount importance that you practice drawing from your carry rig while inside your vehicle. Try it with and without the seatbelt attached. You never know what issues will arise until you go through them in training.

As is always the case, we like to apply simple, generally accepted principles to any combat situation. When engaging a threat from inside a vehicle, if possible, extend the weapon with both hands toward the threat and start shooting! This may require you to lean into/across the seat.

This is an image showing how to shoot with one hand or with a passenger next to youOne-handed shooting from driver’s seat out passenger-side window, both without and with a passenger.

If circumstances dictate, you may choose to engage the threat one-handed, particularly if it is toward the weapon-hand side of the vehicle. The same rules of extending and locking out the arm apply. This method may also come in handy if you have a passenger whom you have to shoot around. In that case, extend the weapon arm past the passenger to prevent them from entering your field of fire. You can deal with their panic, screams, and minor brass burns after you have solved the life-threatening issue at hand.

Shooting Through Glass

While it is possible that your vehicle-based gunfight may erupt on a balmy summer day when all your windows are down or your convertible’s top is down, understand that you may have to fire through the vehicle glass. Staying true to the old training axiom that your body can’t go where your mind has never been, let’s talk about what happens when you shoot through glass. While there is no precise formula to predict what will happen, there are some very reliable principles that we can address.

The side and rear windows of most modern vehicles are composed of tempered glass. When tempered glass breaks, it shatters into many small pieces. These small pieces are very sharp and will cause injury, but for the most part the injuries will be minor compared to if the glass broke into large shards. When firing through tempered glass, the first shot will quite literally blow out the entire window. The glass will probably cause some degree of deflection of that initial bullet, but that will vary depending on the bullet type, weight, angle of strike, etc. The ideal thing to do is fire multiple shots at the target … or a double-tap at the very least.

This is an image of him shooting through glassTinted rear window just prior to (left) and after bullet strike. Polarizing effect of camera lens allows better view of target than was apparent to the shooter. Fire coming out of barrel has not been digitally altered.

If the tempered glass windows are covered by a tinting film, things change. The film acts to hold the small pieces of broken glass in place like interlocking puzzle pieces. The first shot fired will shatter the glass as before, but since the glass cannot fall out of place, the result is that the window becomes almost opaque, thereby obscuring your view of the target. Expect to experience some degree of deflection every time a bullet strikes the film/glass unless bullets travel through pre-existing holes. The best option is to use something to knock the glass out once it has been broken. This can be time-consuming and dangerous.

This is an image of shooting through a windshield

Basic driver’s-seat shooting position using steering wheel as support.

Windshields

The front windshield offers more things to consider. In most modern vehicles, the front windshield is laminated glass. It has a layer of tough plastic sandwiched between two layers of glass. When the glass breaks, it is held in place by the plastic layer. This prevents small pieces from coming loose and flying into your eyes in an accident. It also prevents the glass from breaking into those large deadly shards. What it cannot prevent is small pieces of glass – typically dust-like – from coming off the windshield.

When shooting from the front seat(s), be conscious of the windshield. Since it is clear and nearly colorless in most vehicles and you will be focused on your threat, the stress-induced tendency to push forward into the glass should be taken into consideration. If firing a semi-auto, contact with the glass can induce a malfunction. In the event the threat is directly in front of you, the steering wheel can act as a support mechanism and prevent you from accidentally pushing the weapon into the glass.

The second major variable in shooting through a windshield is the angle of the glass. A bullet in flight is heavier in the rear than in the front. When the front of the bullet strikes glass at an angle (whether the trajectory of the bullet or the position of the glass creates the angle), the part of the bullet that touched the glass slows down first and causes the rear of the bullet to begin moving around to the front. When the bullet breaks through the glass, it continues moving in that direction. In other words, shooting from the inside of a vehicle straight through the windshield, the first round typically strikes high on the target, if it hits the target at all. For many people, this is the opposite of what they think should happen.

This is an image of an actual car shooting

230-grain FMJ round fired from driver’s seat deflected off windshield and into dashboard. This was repeated on Oldsmobile Alero with .357 SIG FMJ round and 230-grain .45 ACP HP.

Field Testing

Our experiments showed that the closer the plane of the glass is to 90 degrees in reference to the bullet strike, the less disturbed the bullet in flight will be. For handguns, there is one guarantee … the first round fired through an intact windshield will be greatly deformed and in some cases will not strike the target. In vehicles with steeply angled windshields, the first round fired may even deflect into the dashboard.

The target image below illustrates some of the aforementioned issues pertaining to windshields. We have done these experiments many times and, while this is only one target, it is representative of what generally happens each time. We used a Glock 21 SF firing 230-grain hollow points (both bonded and non-bonded) and 230-grain FMJ. The target was placed directly in front of the driver, at approximately eight feet from the front bumper of a Dodge Neon. The point of aim for the first four shots is the dark spot in the center chest area marked POA.

This is an image showing different shooting targets

One of several targets fired upon from inside Dodge Neon. This target was directly in front of driver, roughly eight feet from front bumper.

Shot 1, a bonded HP round, was fired through an unbroken windshield. The deflection was relatively slight and to the right of the point of aim. Judging from the hole in the target, the bullet was either deformed, tumbling in flight, or both. Shots 2 and 3 were the same bonded HP fired in rapid succession. The shooter attempted to fire through the hole created by Shot 1. Shot 2 went through the same hole as Shot 1, but Shot 3 struck the glass low. As a result, Hole 2 is very clean and nearly on target, while Hole 3 is off center and deformed like Hole 1.

Shots 4 and 5 were fired through the windshield in areas where the glass was not broken. Shot 4 was a non-bonded HP. It fragmented and the larger fragment struck above the target’s head. Shot 5 was a full metal jacket round. The point of aim for Shot 5 was the belt loop to the left of the number 5. The round struck the target considerably high relative to the POA. It did not fragment but did appear to tumble or deform slightly.

This is an image showing a windshield before and after a shootingWindshield before and after Shot 1. Compare to image of tinted side window

Coming Up

In our next evolution, I hope to cover some advanced techniques and address a few issues encountered when firing from outside the vehicle. When shooting from inside your vehicle (just like anywhere else), use good fundamentals, positively orient toward the threat, and fire multiple shots.

Categories: All ArticlesDefensive FirearmsFeatured Articles, and Handguns.

http://www.personaldefensenetwork.com/shooting-from-vehicles-basic-techniques/